
Cypress Wood Flooring brings more than 20 years of wood floor refinishing to homes in Cypress, CA, serving surrounding cities including Los Alamitos, Hawaiian Gardens, La Palma, Stanton and Buena Park. We sand worn hardwood back to clean wood, correct stains and discoloration, and seal it with finishes legal to apply in the South Coast air basin.
A lot of the floors we refinish were installed in the 1960s and 1970s, and many have spent decades under carpet. Some come up in good shape and need only sanding and finish. Others have staple holes, tack strip damage, pet stains or water marks that need board work first, and we would rather tell you that up front than discover it halfway through.
Every refinish comes with a room-by-room plan and a written cure schedule, so you know which rooms are off limits, for how long, and when furniture can go back. That matters most for longtime owners who plan to stay home while the work happens.
Full Sand and Refinish or Screen and Recoat
When a Screen and Recoat Is Enough
A screen and recoat lightly abrades the existing finish and bonds a fresh coat to it. It restores sheen, fills fine scratches in the finish and adds years of protection without touching the wood. It is the right choice when wear has stayed in the finish and the color still suits you.
It is also far faster and less disruptive than a full sand. Before recommending it, we check that the old finish will accept a new coat, because some older waxes and contaminated surfaces reject modern finishes and cause the new coat to peel.
When the Floor Needs Bare Wood
Deep scratches, gray or black water marks, pet stains and failing finish all mean going back to bare wood. So does a color change, whether that is removing the orange cast of an aged oil finish or moving to a lighter or darker stain.
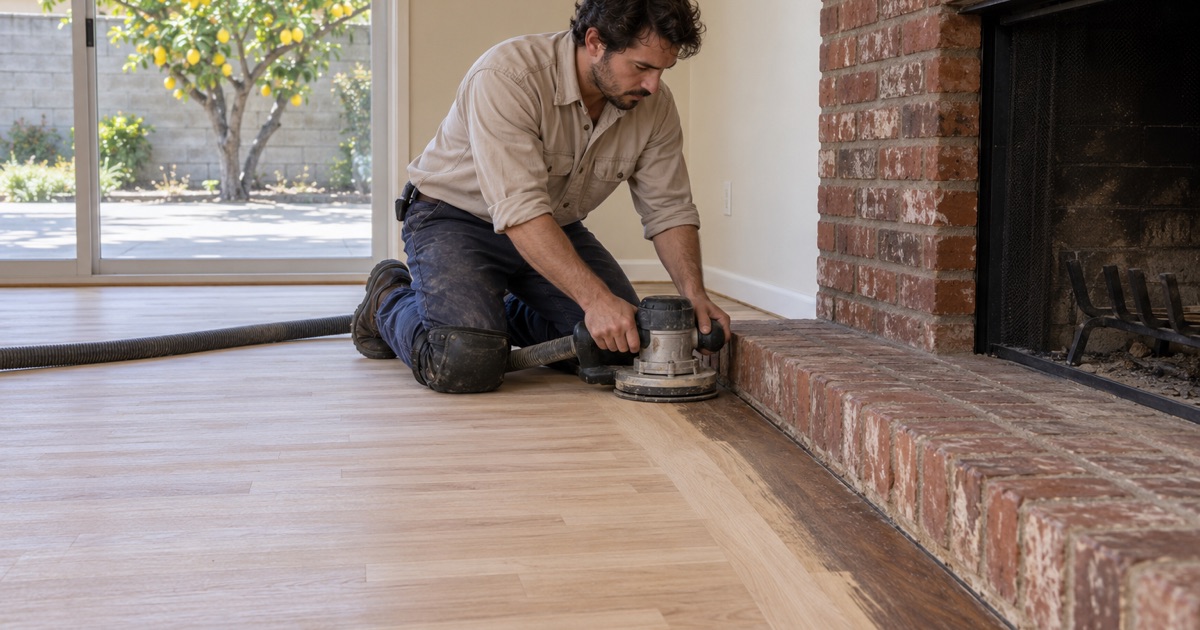
A full sand removes the old finish and a thin layer of wood, flattening the surface so the new finish goes on evenly. We plan it around the wood that remains, because every sanding uses some of it.
Refinishing Engineered Floors
Engineered hardwood can be refinished when its wear layer is thick enough to sand. We measure it at a vent or threshold first. When the wear layer is thin, we steer toward a screen and recoat rather than risk sanding into the core, which ruins the plank and cannot be repaired except by replacement.
What Happens to the Floor Before Sanding
Staples, Tack Strip and Pad Residue
Floors that sat under carpet usually carry flooring staples across the field, carpet tack strip holes around the edges and patches of carpet pad adhesive. We pull staples, scrape residue and fill or replace damaged edge boards. Skipping that step leaves dark dots and rough patches that show through the new finish.
Damaged Boards and Weave-In Repairs
Boards that are cracked, blackened by water or soaked with pet urine rarely sand clean. We cut them out and weave in matching boards staggered with the existing field, then sand the whole floor together so the repair disappears once the finish goes on.
Checking for Asbestos and Lead
In pre-1980 houses, carpet sometimes hides areas of old 9x9 tile or black mastic next to the wood. We leave those undisturbed until an asbestos survey answers the question, with any removal handled under SCAQMD Rule 1403. In pre-1978 housing we sand painted trim and shoe molding under the EPA Renovation, Repair and Painting rule.
What Refinishing Can and Cannot Fix
Discoloration: Orange, Gray and Black
The orange cast on many older oak floors comes from an oil-based finish that has ambered over the decades, and it sands away completely. Gray oak is usually weathered or water-affected wood near doors and windows, and it often sands out if the graying has not gone deep into the fibers.
Black marks are the hard case. Pet urine and water that sat against iron fasteners react with the tannins in oak and can stain far below the surface. We sand a test area first, and where the stain survives, we replace those boards rather than leave a dark shadow under a fresh finish.
Movement: Cupping, Gaps and Squeaks
Refinishing does not cure a moisture problem. If boards are cupped, we find out why before sanding, because a floor sanded flat while it is still wet will crown as it dries. Once moisture content is back in range, a cupped floor can often be sanded flat and refinished with good results.
Seasonal board gaps are normal in solid wood and usually close again, so we rarely fill them. Squeaks come from loose boards or fasteners rather than the finish, and we can often secure them from above before sanding, so the refinished floor is quieter as well as better looking.
Worn-Through Engineered and Prefinished Floors
Some prefinished hardwood has a factory finish that bonds poorly to new coatings, and some engineered planks have a wear layer too thin to sand. In those cases a refinish may not be the right answer, and we say so plainly, laying out board replacement or a new floor as the alternatives.
Where a prefinished floor can take a recoat, we use a bonding process suited to factory finishes and test adhesion in a closet or corner first. That small test is what separates a recoat that lasts from one that scratches off in a month.
Our Step-by-Step Wood Floor Refinishing Process
Step 1: Inspect and Measure
We look at the floor, test the existing finish, and measure moisture content with a wood moisture meter. Wet wood sands unevenly and can cup or crown after refinishing, so a reading out of range means finding the source before we start.
Step 2: Sand Through the Grit Sequence
The field is sanded with a drum sander, the perimeter with an edger, and the whole floor is blended with an orbital sander. We move through a grit sequence from coarse to fine, because skipping a grit leaves scratch patterns that only show once stain goes on.
Step 3: Stain Samples and Color Approval
If you want color, we put test patches on the sanded floor and you pick the one you like in your own light. Some species, maple especially, take stain unevenly and can look blotchy, so we may recommend a conditioner or a natural finish for them.
Step 4: Finish Coats
We apply the finish in multiple coats, lightly abrading between them for adhesion. Each coat is applied at the right thickness, since overly heavy coats are a common cause of sticky polyurethane that never fully hardens.
Step 5: Cure Schedule and Handover
You receive a written schedule showing when each room can take socks, shoes, furniture and rugs, along with care instructions for the finish you chose. We walk the floor with you before we leave.
Choosing the Right Finish
Waterborne Polyurethane
Waterborne polyurethane dries clear, keeps light woods light and has a lower odor than older products. Modern commercial-grade versions are highly durable, and quick drying lets us finish more coats in a day, which shortens the time your household is displaced.
Oil-Modified Polyurethane
Oil-modified polyurethane gives a warm amber tone and a thick, durable film, and it will deepen in color over time. Many owners of 1960s and 1970s houses like the traditional look it gives red oak. It takes longer to dry and cure than waterborne products.
Hardwax Oil and Sheen Level
A hardwax oil finish soaks into the wood and leaves a natural, low-sheen surface that can be spot repaired. We also help you choose a sheen level, from matte to gloss, knowing that lower sheens hide scratches and dust better. Every product we use meets the 275 g/L VOC limit set by SCAQMD Rule 1113.
- 20+ Years in Wood Flooring
- Moisture Readings in Writing
- Room-by-Room Cure Schedule